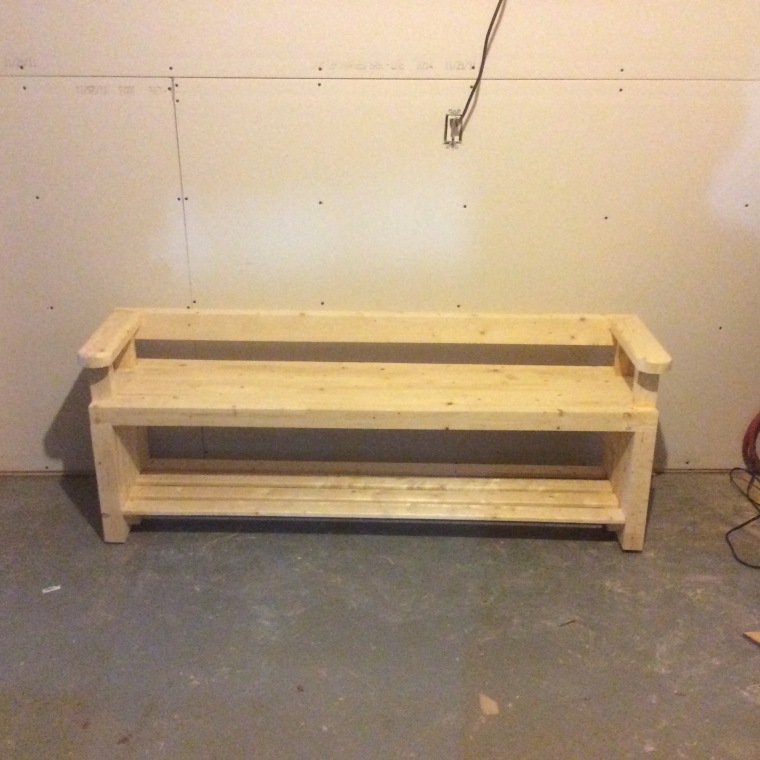
I’m not sure where to start with this bench. This was my first build for someone I didn’t know, so I was a little nervous but I figured I could do this. I decided to go with a similar style to a bench that I had previously made. I added arms, a shoe rack and a back to this one. That sounds easy, but I’m over a month into this build and I’m just finishing it. Mind you, it’s tough to be down in the shop, in the dead of summer, cutting and clamping wood next to the furnace. She gets a little hot down there. I always try to stay hydrated though…
This bench had a few mistakes but I learned a lot of valuable lessons from it. I was never much of a planner. If I have an idea, I’ll roll with it and work out the kinks along the way. As it turns out, this isn’t always a great idea. A well thought out plan with measurements and a sketch-up can go a long way in the wood working world (and maybe in other aspects of life, too?).
My first mistake was using different length lumber in this build compared to my original bench. Instead of using 4 inch lumber, I used 3 inch lumber. I remembered this after all my cuts were made, so I had to improvise and head back to the hardware store for more wood (lol).
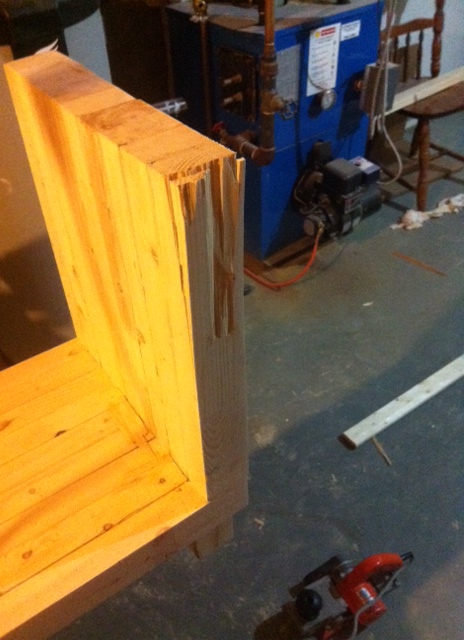
Next was trying to level out the legs. I used a hand planer (my first time using one) and completely tore off the end of the leg (see pic below). They are tricky to use and it probably wasn’t an ideal tool to use (thanks for the lend, Juddy Judson Sr). I had to start again, but I got the hang of it!
Last, but certainly not least, was the stain. It is really important to do the prep work before you stain. Sanding is very important. If you do a shitty job sanding you can really see all the imperfections in the lumber once you fire a stain on. I noticed this when I was finished. I wasn’t happy at all with the job and couldn’t possibly give this to someone, let alone sell it. So I decided I’d sand all the stain off and go with a darker stain (a tip from my future father in law. He’s not a bad fella). It ended up taking 3 hours to sand it all off. I also decided to put a higher back on and change the arms before I put a new stain on.
Over all, I think it turned out pretty nice. It certainly isn’t perfect but I’m just learning as I go, and making mistakes is part of the progress. Although I’d certainly like to cut down on my mistakes. Hopefully my client likes it.(lol @ client) She may end up using it for fire wood, but at least it should burn real good. 🙂 After all is said and done, I was probably paying myself 13 cents an hour for this build. But a lot of lessons made it well worth it! As the great Henry Ford once said “ The only real mistake is the one from which we learn nothing”
Special thanks to everyone who reads this. I’ve been getting lots of great feedback and I’m glad I can make a few people smile. My next build will be my biggest. A custom made harvest table for my good friends Kerri and Chris. They would like it fished for start of September. Hopefully I’ll have it finished by… 2017. Should be a fun build.


Hey Juddy, very nice job on the blog and the bench. The bench looks amazing and sort of looks like a modern take on a classic Deacons Bench, with a Quaker twist. Very nice lines.
LikeLiked by 1 person
Golden rule ****Measure twice cut once😊 Great job , looks awsome !
LikeLike